by Yejun Wu (6/20/2009)
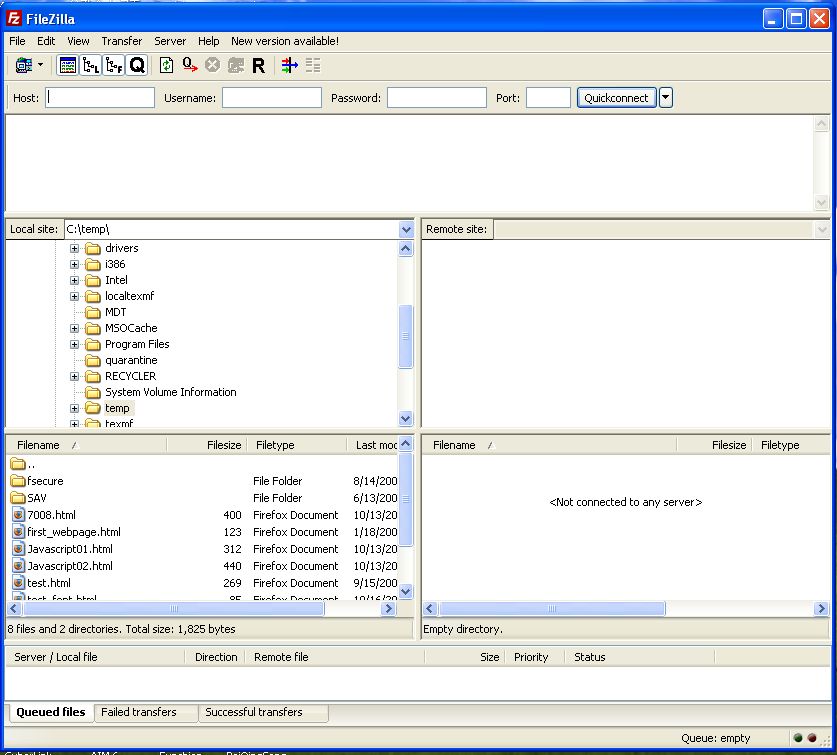
Suppose you have downloaded and installed FileZilla on your computer. Now initiate FileZilla, you will see an interface like this:
Now type in:
FileZilla shows the connection status (i.e., successful or failed) on the top pane. If connection fails, probably you have typed in a wrong userid and/or password.
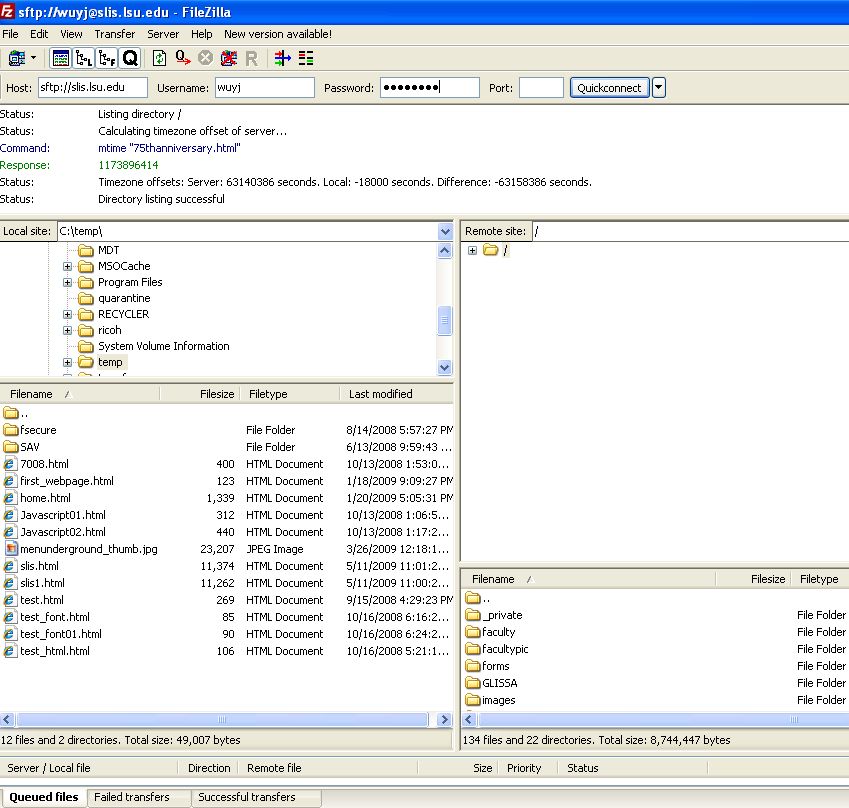
The middle left pane shows "Local site" which means your local computer. The bottom left pane shows the directories and/or files under the directory you specified in the middle left pane. In the screenshot, the bottom left pane shows the content of the C drive I specified in the middle left pane. (Note: directory also means folder.)
The middle right pane shows "Remote site" which means the SLIS Web Server (which is slis.lsu.edu). It shows your root directory on the server by default. Note the root directories on the server are not named as C, D, or F drive. Of course you can create directories on the server (just like the way you create directories on your own local computer). The bottom right pane shows the directories and/or files under the directory you specified in the middle right pane. Note that in the screenshot, the bottom right pane shows everything under MY root directory on the server; your bottom right pane should be empty the first time when you login successfully.
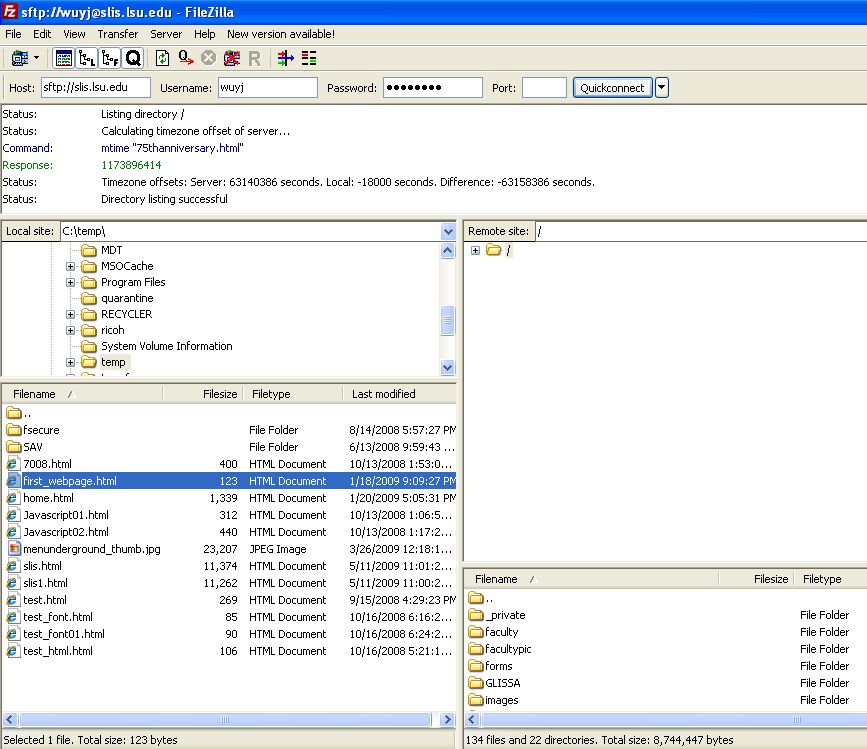
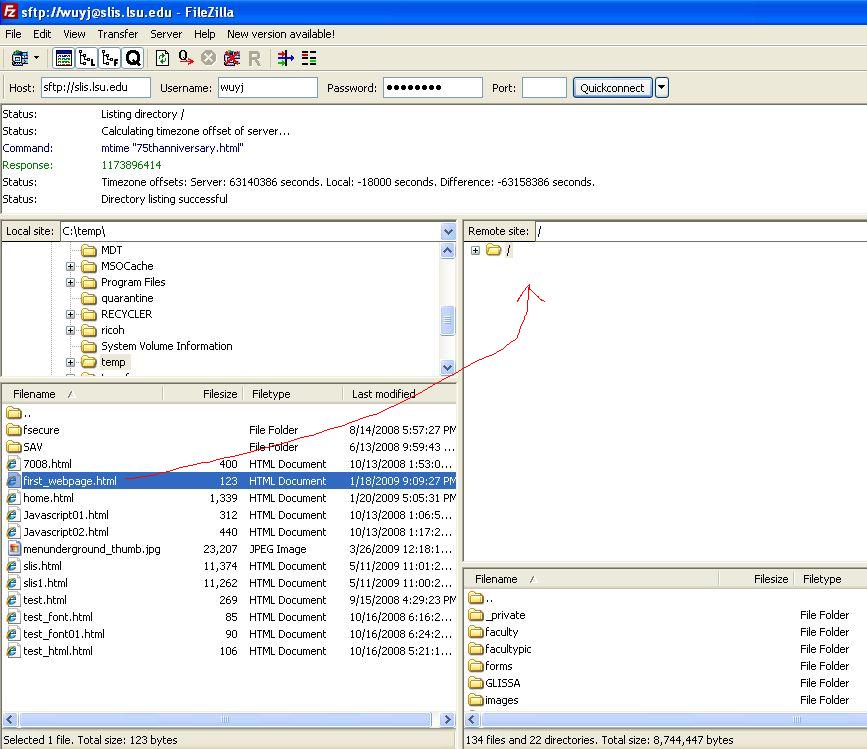
When you are ready to upload files from your local computer to the server, locate the directory (where you saved the files) on the middle left pane, find the files you want to upload on the bottom left pane. Click and drag the file from the bottom left pane to the middle right pane (or a directory on the middle right pane). Once uploaded, the file will be shown on the bottom right pane.
The following 2 screenshots show that I navigated to C:\Temp\ to find the file (first_webpage.html) I want to upload, then click and drag it to the server side.
Now, if you have correctly uploaded the file to the root directory of the server, your URL to access that file is:
http://slis.lsu.edu/faculty/wu/7008/su09/your_folder/mypage.html (where your_folder is your your lastname followed by your first initial,
all in lower case, but probably not case-sensitive).
If you have uploaded the file to a sub-directory (such as "homework") on the server, you have to insert the sub-directory
into the path of your URL to get a correct URL, e.g.,
http://slis.lsu.edu/faculty/wu/7008/su09/your_folder/homework/mypage.html (where your_folder is your lastname
followed by your first initial, all in lower case, but probably not case-sensitive).
To make sure you have done everything correctly, open a browser and type the URL in the address box to see whether the browser presents your Web page.
If you want to delete the files on the server side, you can click the files, then push the "delete" key. Caveat: do not use FileZilla to delete the files on your local computer because the deleted files will NOT be dumped into the Recycle Bin, they are permanently gone instead.
More tutorials on FileZilla are available on the Syllabus page, but they are not in the context of connecting the SLIS Web server.